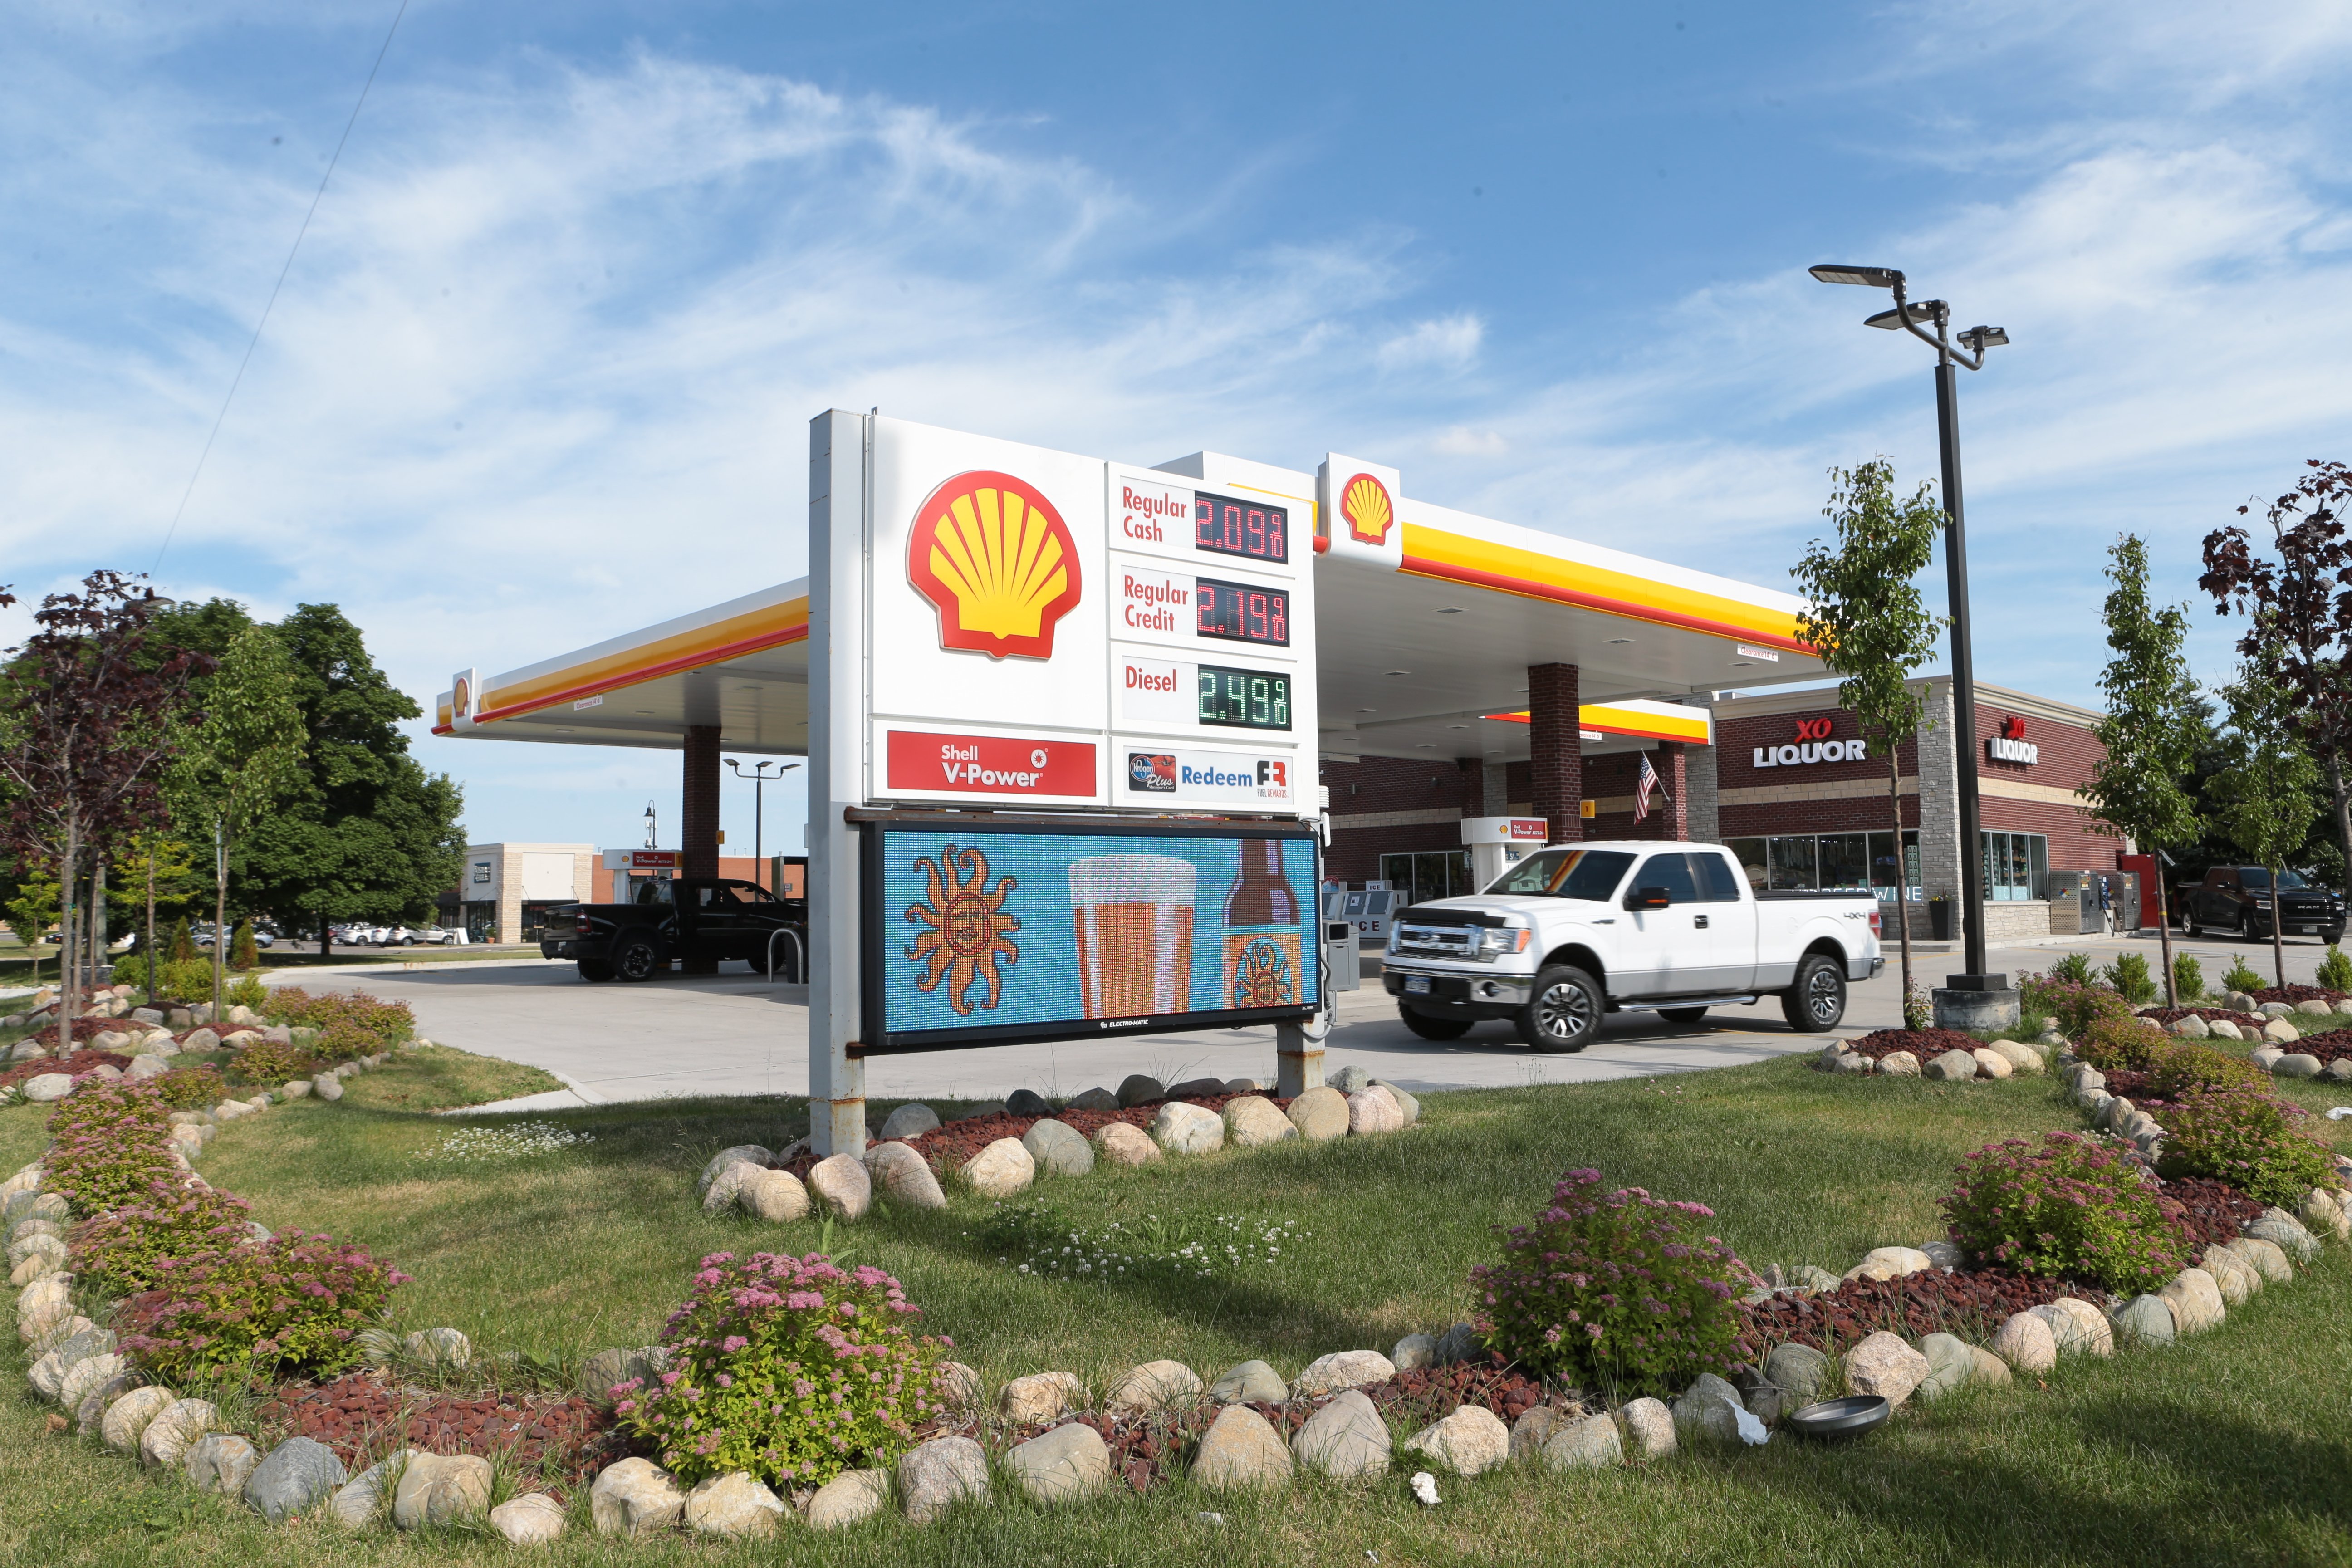
Photographing your LED sign is not the easiest of tasks. It looks good in person, but you might not know exactly how to photograph your LED sign perfectly. Camera lenses don’t reflect and pick up light the way our eyes do and that’s why some pictures don’t come out the way you hoped.
Here are some tips on how to photograph your LED Sign to make the most attractive pictures.
.jpg?width=6240&name=B%20Harbaugh%2020%20066%20(1).jpg)
Use the Right Camera Mode
Once you have a camera, look for the different modes on yours. The camera mode will make a huge difference in the quality of your photo.
Shutter Speeds
Look on your camera for the mode called “Shutter Priority Mode” or “Tv” or “S” mode on your camera. This will allow the correct amount of light to be let in to the camera lens to be able to handle the brightness of an LED sign. If this mode still doesn’t work for you, try putting it in “Manual Mode” or “M”. If you are in manual mode you are going to have to play around with the settings to get the correct photo. Once you get a feel for it you will have great looking photos.
Shutter Priority Settings
Note: This tip only applies to manual mode

Shutter speed might be the most important thing to adjust on your camera before you take pictures of your LED sign. The most common problem that people have when taking a photo of their LED sign is having the sign look like it has lines going through it. To fix this, we have to match the LED signs refresh rate so that doesn’t happen. To fix this major issue we have to slow down the shutter speed. There are several recommendations for what exactly you should change your shutter speeds to. Start off by slowing the speed down to 1/15s. If that doesn’t help keep going down the line, 1/30s, 1/60s or 1/125s. If your camera allows 1/8 or 1/4s give those a try. You can try all the speeds and see what one works best for you. Lastly, you need to have the camera steady because of the slow shutter speeds. If that doesn’t help keep going down the line, 1/30s, 1/60s or 1/125s. If your camera allows 1/8 or 1/4s give those a try. You can try all the speeds and see what one works best for you. Lastly, you need to have the camera steady because of the slow shutter speeds. If you don’t the pictures will not come out clear, so use a tri-pod or steady surface for best results.
1/15t"h of a second is a good starting point, but you will need a tripod or to put your camera on a solid surface (e.g. bench, car) to use that speed. The shutter speed means how long the shutter is open. A slow shutter speed lets in more light and is more appealing for smooth LED sign images and also brighter background (“ambient”) lighting. If you do not have a tripod with you, 1/60 th of a second should give a clean appearance to the graphics. It is a good idea to bracket your shutter speed to have options when reviewing the final images, for example taking three images at three different speeds, e.g. 1/30th of a second, 1/60th of a second and 1/125th of a second.
Note: The smaller the number in the denominator means a slower speed (i.e. the shutter is open longer) and the larger the number in the denominator means a faster speed (i.e. the shutter closes more quickly).
Use ISO on Manual Mode
The ISO setting changes the sensitive of the camera sensor to light. The smaller the ISO number is, the less sensitive the sensor will be to light. The higher the ISO number is, the more sensitive the sensor will be to light. So, on a sunny day, start with a low ISO like 100 to avoid the photo being overexposed. If it’s a bright, but overcast day, start with an ISO of 200. If it is dusk or the sign is located in the shade, you can try using an ISO of 400 to increase the brightness of the photo.
Using F-Stop to Improve Image Quality
Note: This tip only applies to manual mode
'"The f-stop will allow the image sensor to control the level of light that can come in. The aperture settings or "f-stop” allows the lens aperture to control the amount of light to enter the camera through the lens. An f-stop with a smaller number like 2.8 will open the aperture wide to let in a lot of light, which is helpful in dark situations, but will overexpose if the location is sunny," says professional photographer, Amy Lemus.
Additionally, with the aperture open wide like at 2.8, depth of field is shallower, meaning more of the objects in view will be out of focus. A large f-stop number will help to reduce the lighting on a sunny day and will also increase the depth of field so that almost everything in the frame will be sharp. On a sunny day, the sunny side of the sign could be photographed at f 11. On a sunny day, the shaded side of the sign could be photographed at f 9. Again, it is suggested to bracket the settings by photographing at three different f stops, such as f9, f11, f22.
Considering when you are shooting LED signs you are going to have a low shutter speed, as we discussed earlier, so you are going to need a higher f-stop. Go ahead and set your camera to the highest f-stop function and gauge if it meets your standards, if it doesn’t decrease the f-stop as you wish. Having a higher f-stop with a low shutter speed will keep the photos clear and less likely to be washed out.
Take Pictures of Your LED Sign With a Cell Phone

There is a debate about using cell phones for pictures of your LED sign, but in my opinion I find cell phones to work fairly well. However, if you were planning on using these pictures for a publication or a cover photo on your website, I would suggest not using your cell phone. I use my cell phone as a last option and to give you an example, here is one I took of Electro-Matic Visual’s LED sign in Royal Oak, Michigan. It came out decently well, but it took several efforts and the correct conditions to get this result. In short, it is best to use at the minimum a digital camera.
Other Factors to Keep in Mind

Don't ignore the background when photographing your LED Sign.
- Make sure that you check your background. Don’t have anything unattractive about the background to distract your photo of your LED Sign such as electrical wires, cars, and trash cans. Tips to avoid a cluttered background include taking the side of the sign with the fewest distractions, shooting on an angle that features the sign but doesn’t include clutter, shooting at a low angle directly facing the sign for ground mounted signs so that the sign itself obscures objects in the background.
- If it is in your control, have quality, full color on your LED display and great content. Great content makes your sign much more appealing.
- Take a lot of photos: the more options that you have the better your end result will be. Some good options include a straight-on view of the sign in its base/casing, including any nice landscaping, a view of the sign on an angle and a looser framing of the sign to include the building at that location.
- Make sure the sun isn’t directly coming from the background and into your camera lens, i.e. "lens flare”. A lens hood can reduce flare, or you can hold a large piece of cardboard over the end of the lens to block the sun, or simply photograph from a different angle to avoid direct sunlight. However, sometimes a nice sunset will create a very attractive photo without taking away from the quality of your LED sign.


